August 9, 2025
Transform Your Pictures with Google Sharpen Image AI

Greg Kopyltsov
Founder
google sharpen image ai
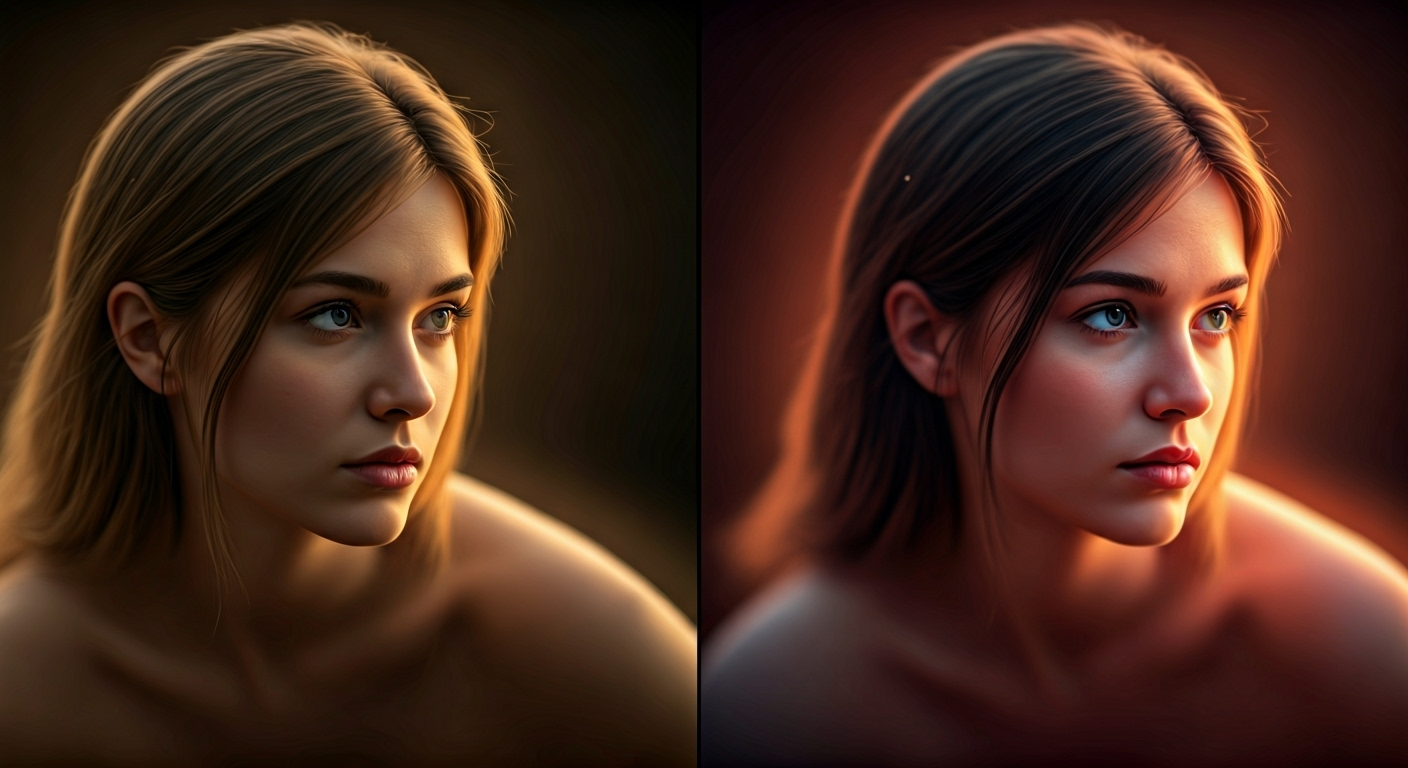
Enhancing your memories has never been easier, thanks to Google Photos’ AI-driven image sharpener. If you’ve ever been frustrated by blurry or dull pictures, the latest Google Photos update puts powerful AI tools right at your fingertips. This image sharpener uses advanced algorithms to boost clarity, reduce noise, and bring out the finer details in every snap. Whether you’re editing on Android or iOS, Google Photos’ AI features aim to make your images look crisp and vibrant—even if they weren’t perfect in the first place.
Google’s AI image sharpener combines sophisticated algorithms with user-friendly controls to transform your pictures. When you upload a photo with blur or poor clarity, the AI assesses the image, determines the level of blur, and applies targeted enhancements to restore sharpness. This process works seamlessly in the app, whether you’re trying to fix a minor blur or improve brightness.
The core technology uses methods like the “pull-push” denoising algorithm and “polyblur” deblurring, enabling fast, camera-agnostic improvements for both iOS and Android devices. Curious how to use these features? Let’s break down the process.
If you want to fix a blurry photo, Google Photos’ photo unblur tool is the place to start. This AI-powered feature evaluates your picture, detects areas lacking sharpness, and intelligently restores detail. Here’s how you can use it on iOS or Android:
The AI doesn’t simply increase contrast—it analyzes both the blur and the brightness of your image, fine-tuning sharpness without amplifying noise. By using these tools, you’ll instantly notice improved clarity in your pics, making previously unusable photos ready to share. And if you need to remove other distractions, Google Photos’ magic eraser is just a tap away, helping you perfect your images with additional ease.
Google Photos offers several AI-powered enhancements, but it’s important to know how each one functions. Sharpening and noise reduction often work together but serve distinct purposes. The image sharpener increases detail and brings out textures, while noise reduction smooths out unwanted grain—especially in low-light images.
Here’s a comparison in a handy table:
Feature
Purpose
How the Algorithm Works
When to Use
Sharpening
Boosts detail & clarity
Applies filters to edge and texture
Slightly blurry pics
Noise Reduction
Reduces grain & noise
Averages similar pixels; smooths grain
Low-light/noisy shots
Photo Unblur
Restores mild blur
Identifies blur kernel, reverses blur
Mildly out-of-focus
Magic Eraser
Removes objects/distractions
AI detects distractions, erases them
Editing backgrounds
While AI sharpening and noise reduction use different algorithms, they’re most effective when used in tandem—first removing noise, then enhancing sharpness for a polished finish.
You don’t need advanced skills to use Google Photos’ image sharpener—just follow a few simple steps. First, open the app on your Android or iOS device and pick the photo you want to improve. Select the edit tools, then choose the sharpen or photo unblur options. Adjust the intensity with the slider until you’re satisfied with the clarity.
After saving your edits, your image will appear sharper and more vibrant. Now, let’s dig deeper into how to access all these powerful features, including magic eraser and unblur, in the next section.
Getting started with Google Photos’ advanced AI features is straightforward on both Android and iOS. Once you’re in the app, tap on the photo you want to edit, then press the “Edit” button. Within the editing menu, you’ll find options like “Magic Eraser,” “Unblur,” and “Sharpen,” each designed to enhance your images in specific ways.
While Google Photos doesn’t offer a separate standalone app for these features, its integration is seamless and powerful compared to free online sharpeners. The combination of denoise, photo unblur, and magic eraser provides an edge over many competitors—giving you pro-level edits without leaving the app.
To get the sharpest and clearest photos, keep a few best practices in mind when using Google Photos’ AI tools. Start with the highest-resolution original you have, as AI algorithms work better with more image data. Adjust the sharpening and denoise sliders carefully—overdoing it can result in an unnatural look or highlight unwanted artifacts.
Despite its power, Google’s AI has limitations: it performs best on mild blurs and can’t fully restore heavily out-of-focus photos. In some cases, excessive use may introduce artifacts or “plastic” effects. Always review your results before sharing or printing.
KeywordSearch has an AI Audience builder that helps you create the best ad audiences for YouTube & Google ads in seconds. In a just a few clicks, our AI algorithm analyzes your business, audience data, uncovers hidden patterns, and identifies the most relevant and high-performing audiences for your Google & YouTube Ad campaigns.
You can also use KeywordSearch to Discover the Best Keywords to rank your YouTube Videos, Websites with SEO & Even Discover Keywords for Google & YouTube Ads.
If you’re looking to SuperCharge Your Ad Audiences with AI - Sign up for KeywordSearch.com for a 5 Day Free Trial Today!
In conclusion, Google Sharpen Image AI is a powerful tool that can dramatically enhance the quality of your photos. By utilizing its advanced features, such as unblurring and sharpening, you can transform your images into stunning visuals with just a few clicks. Moreover, understanding the differences between sharpening, noise reduction, and other enhancement techniques allows you to select the best approach for your specific needs. As you embark on your journey with Google Photos, remember to apply the tips shared in this guide for optimal results. If you're ready to take your photography to the next level, consider trying out Google Sharpen Image AI today for an easy and effective photo enhancement experience.
No, you don’t need a subscription or a Pixel phone to use Google Photos’ AI sharpening features. These tools are available for free within the Google Photos app on both iOS and Android devices, making them accessible to most users without extra cost.
Google’s AI is designed to address mild blurs rather than extreme ones. It uses advanced algorithms to improve clarity and sharpness but may not fully recover details in photos that are heavily out of focus. For best results, use the tool on slightly blurry images.
When you edit photos using Google’s AI, your images are processed through the app’s algorithms. Google’s privacy policy applies, so your data remains within their ecosystem. Review app permissions and privacy settings to ensure you’re comfortable with how your photos are handled.